Posting Instructions
Click images to enlarge.
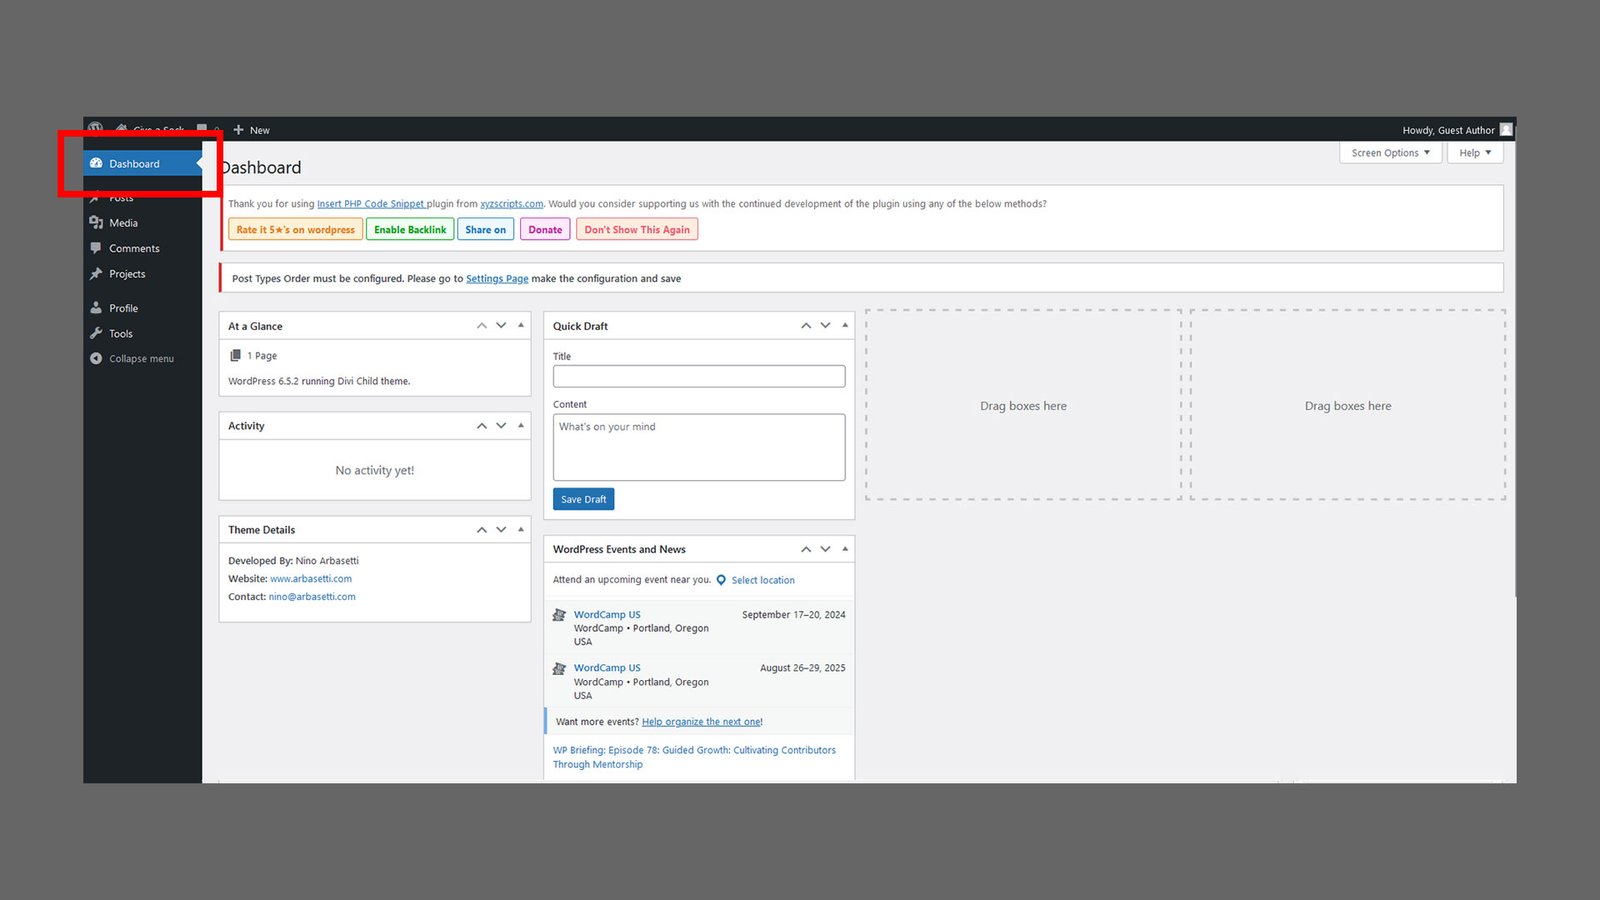
Step 1
When you first log into the Give a Sock blog you will be taken to the Dashboard as seen in the image.

Step 2
To add a post to the page you want to click on the Posts menu item located directly under the Dashboard menu item on the left side of the screen as seen in the image.
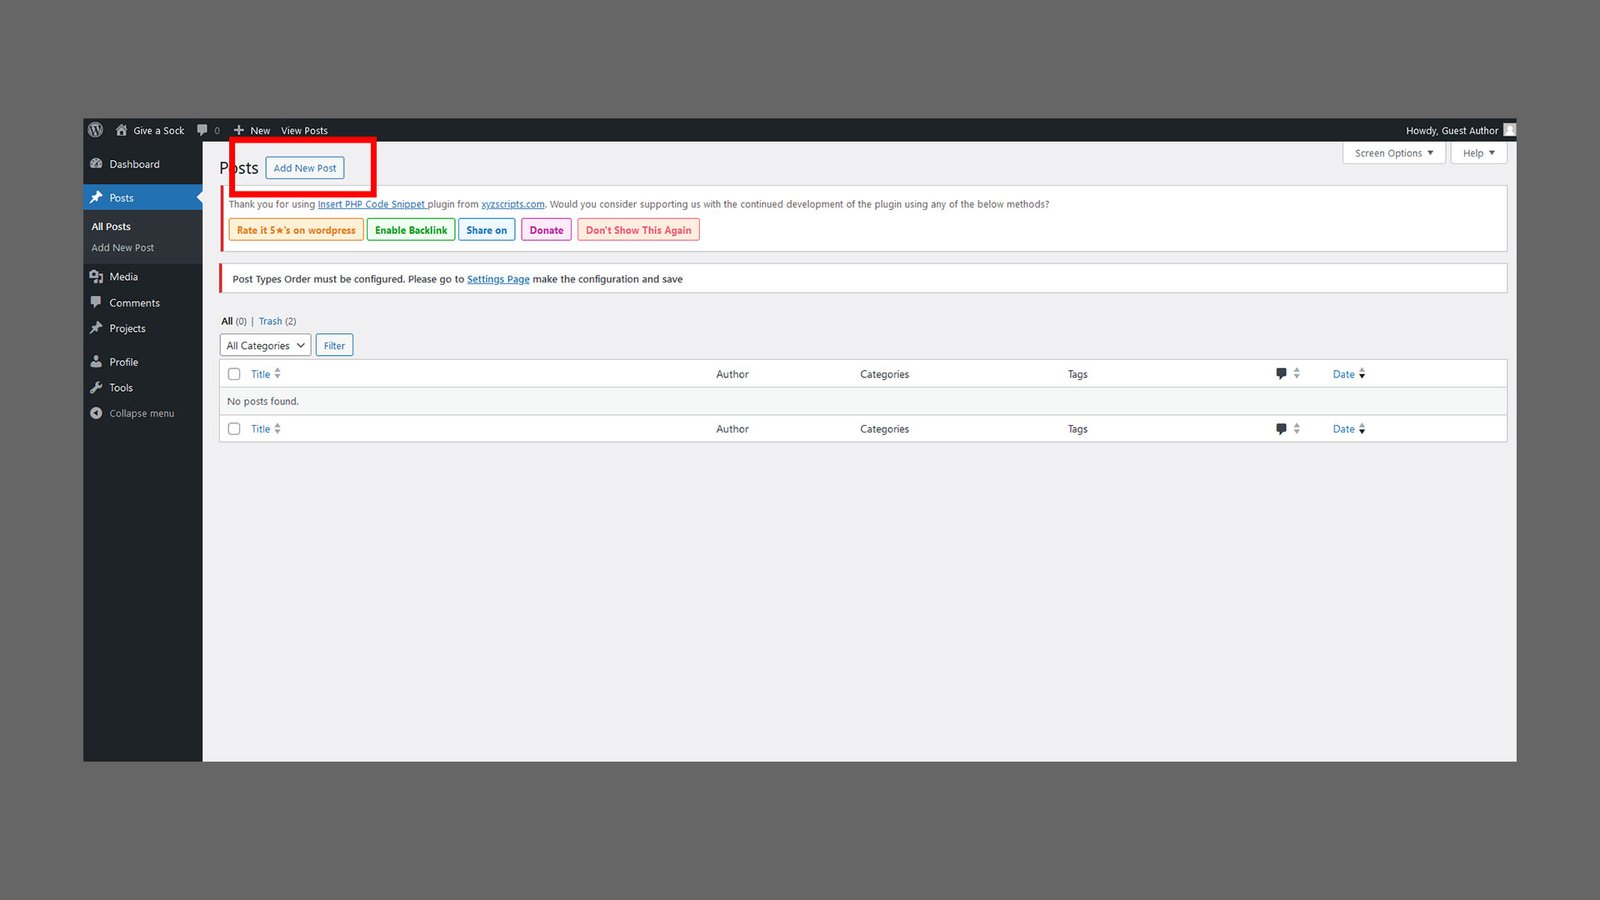
Step 3
On the Posts screen click on the Add New Post button located near the top-left portion of the screen as seen in the image.
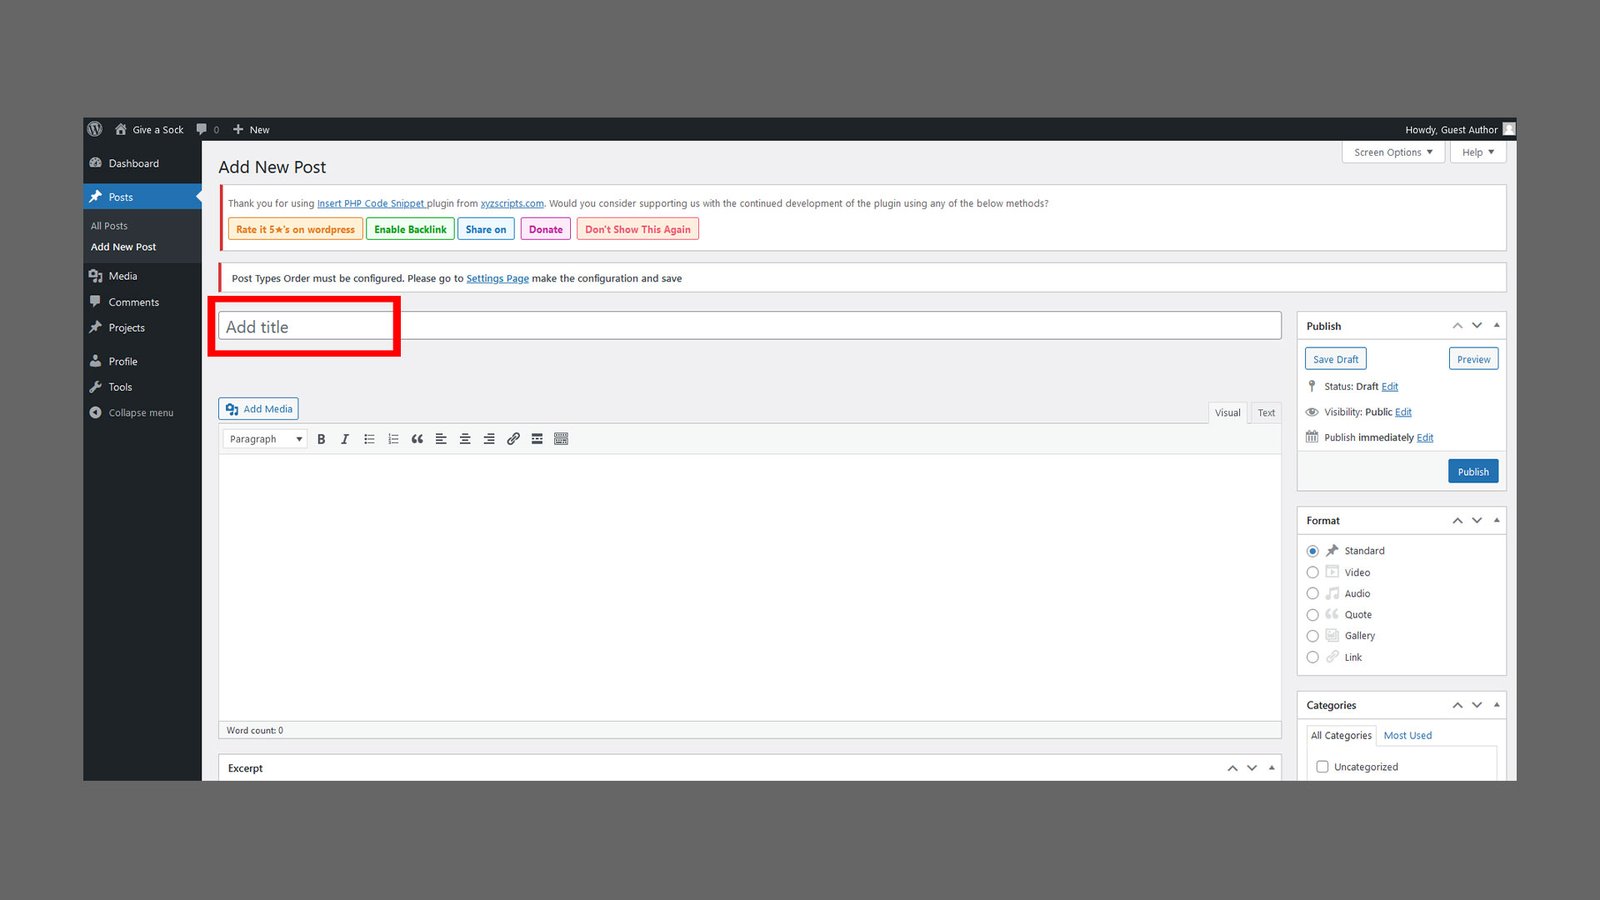
Step 4
This will take you to the Add New Post screen. The first thing you can do is add a title as seen in the image.
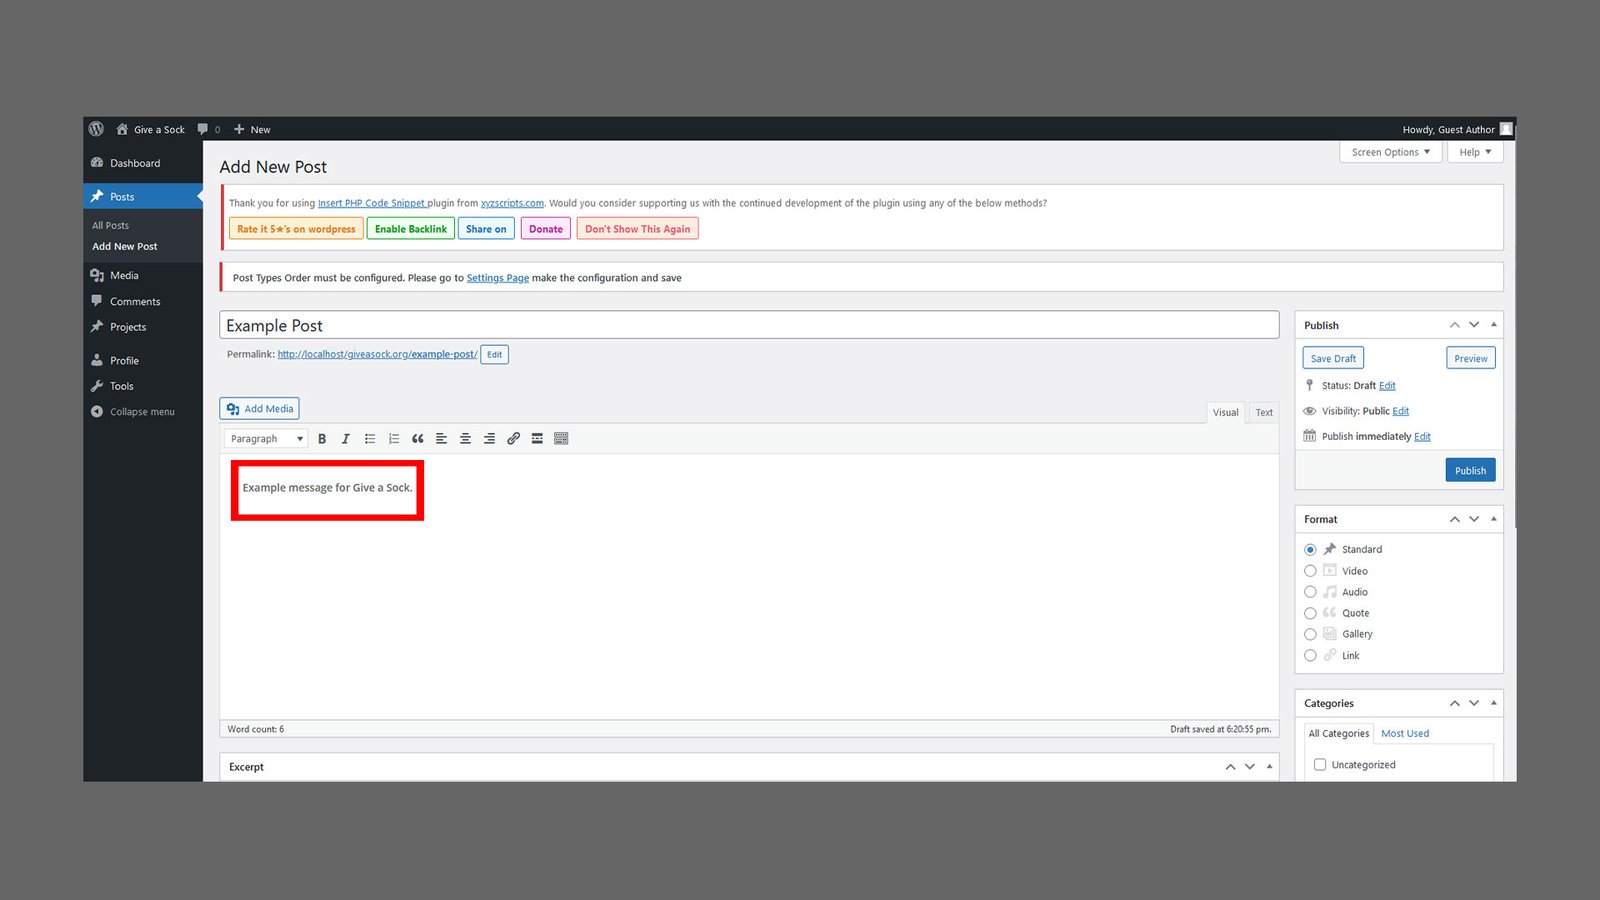
Step 5
After you add a title, you can add your actual message as seen in the image.
Step 6
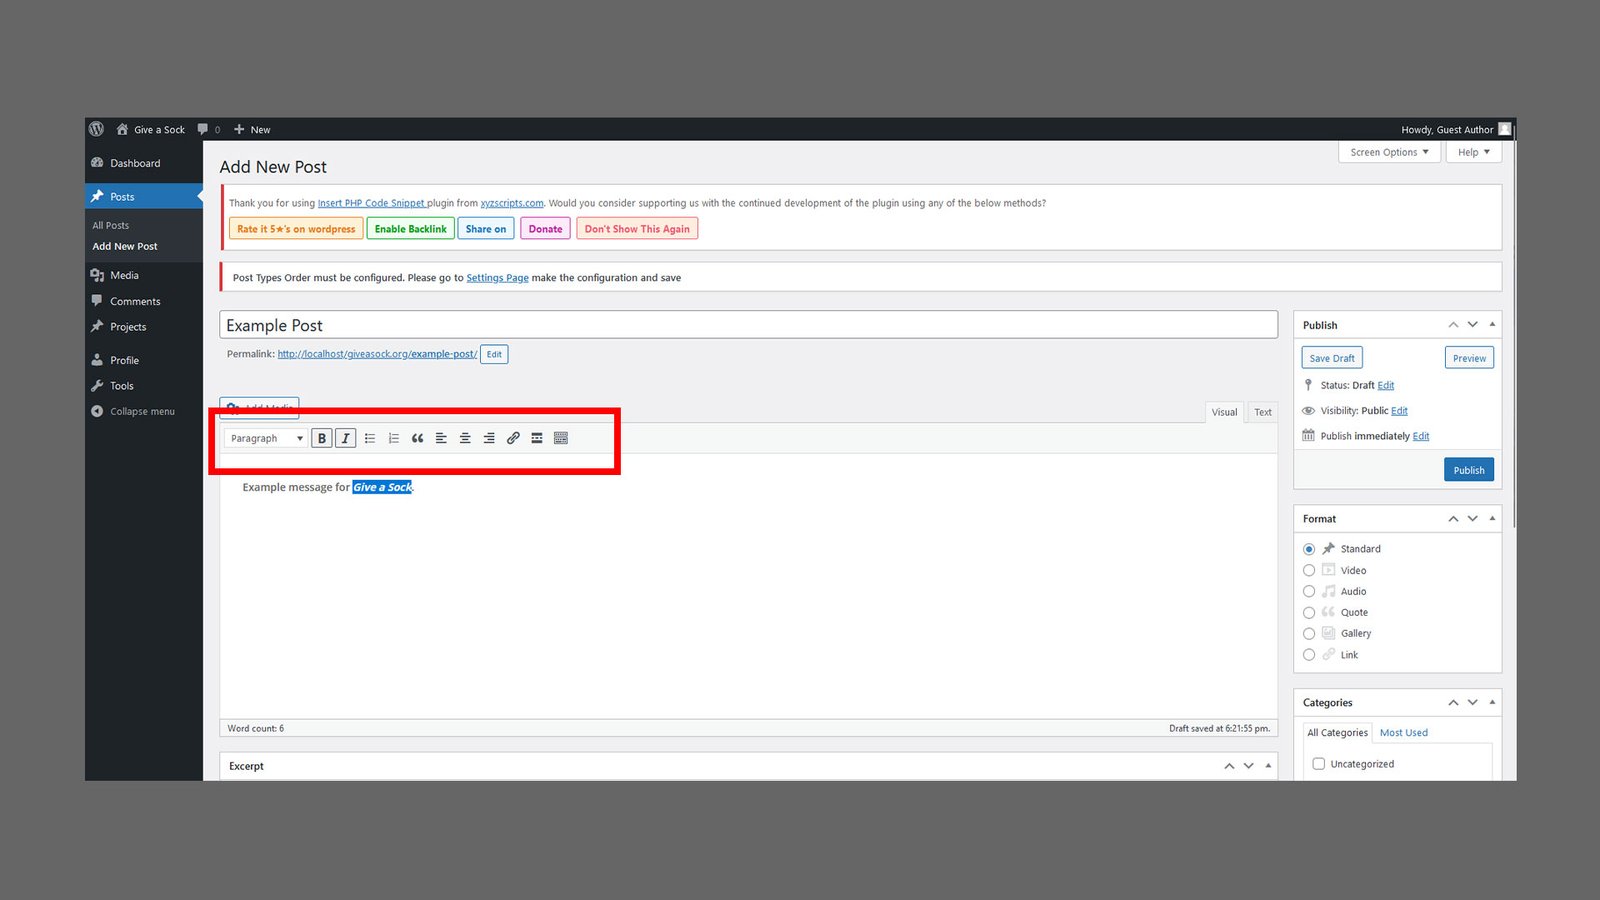
If you like, you can add styling to your message using the menu directly above the post field. This allows you to add italics, bold lettering, change the font size, adjust the margins and several other things as seen in the image.
Step 7
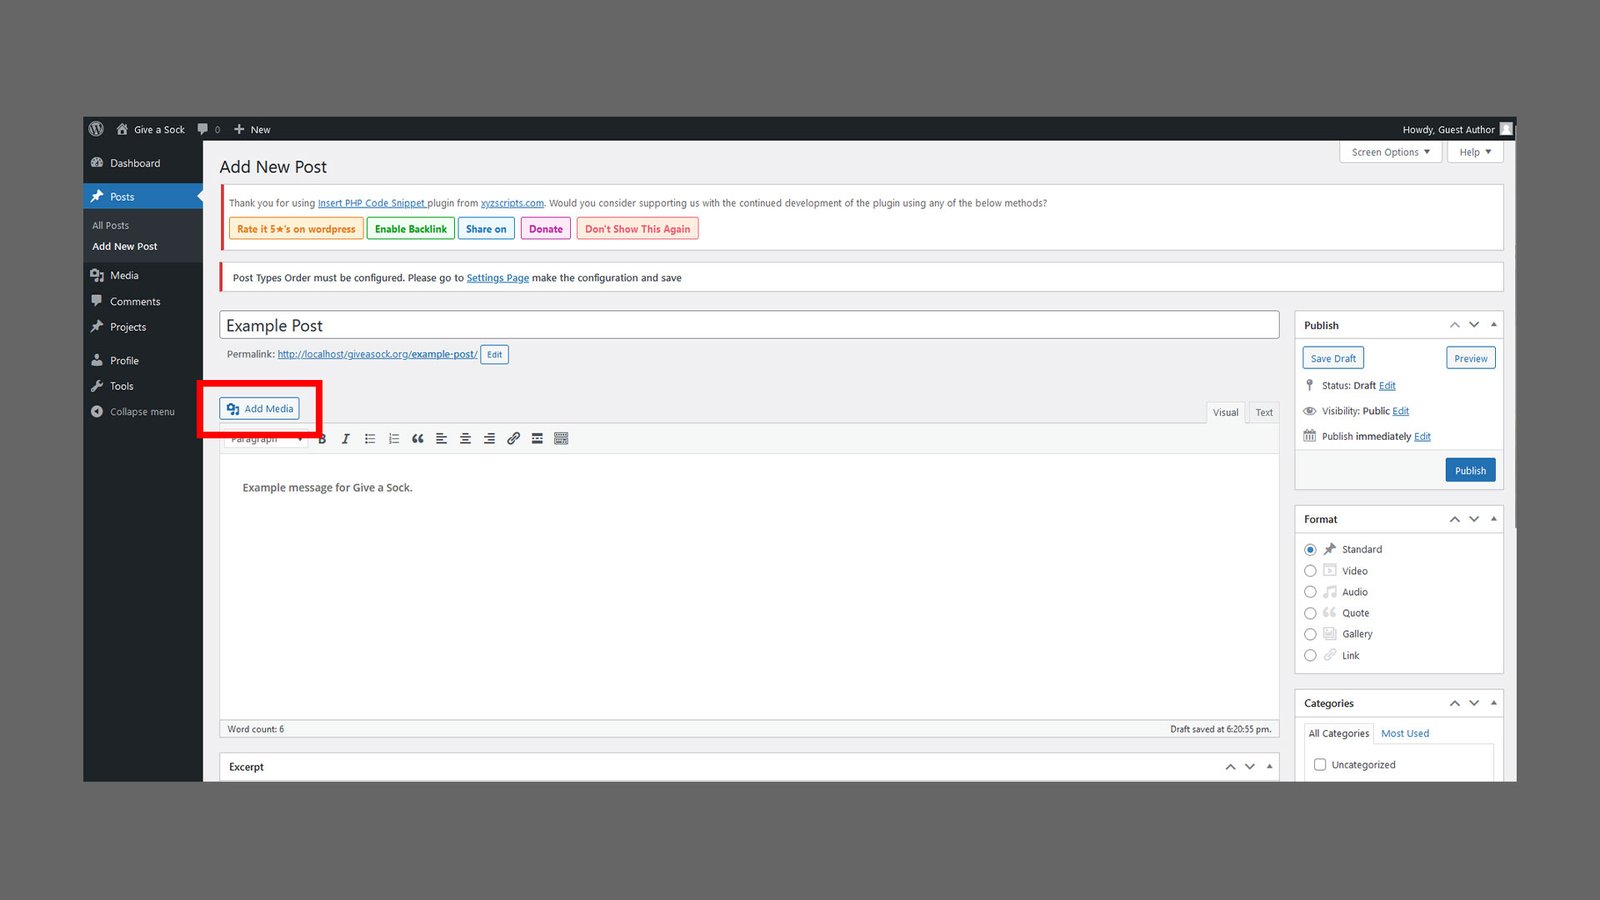
If you also like, you can add media to your post by clicking the Add Media button above the post field as seen in the image.
Step 8
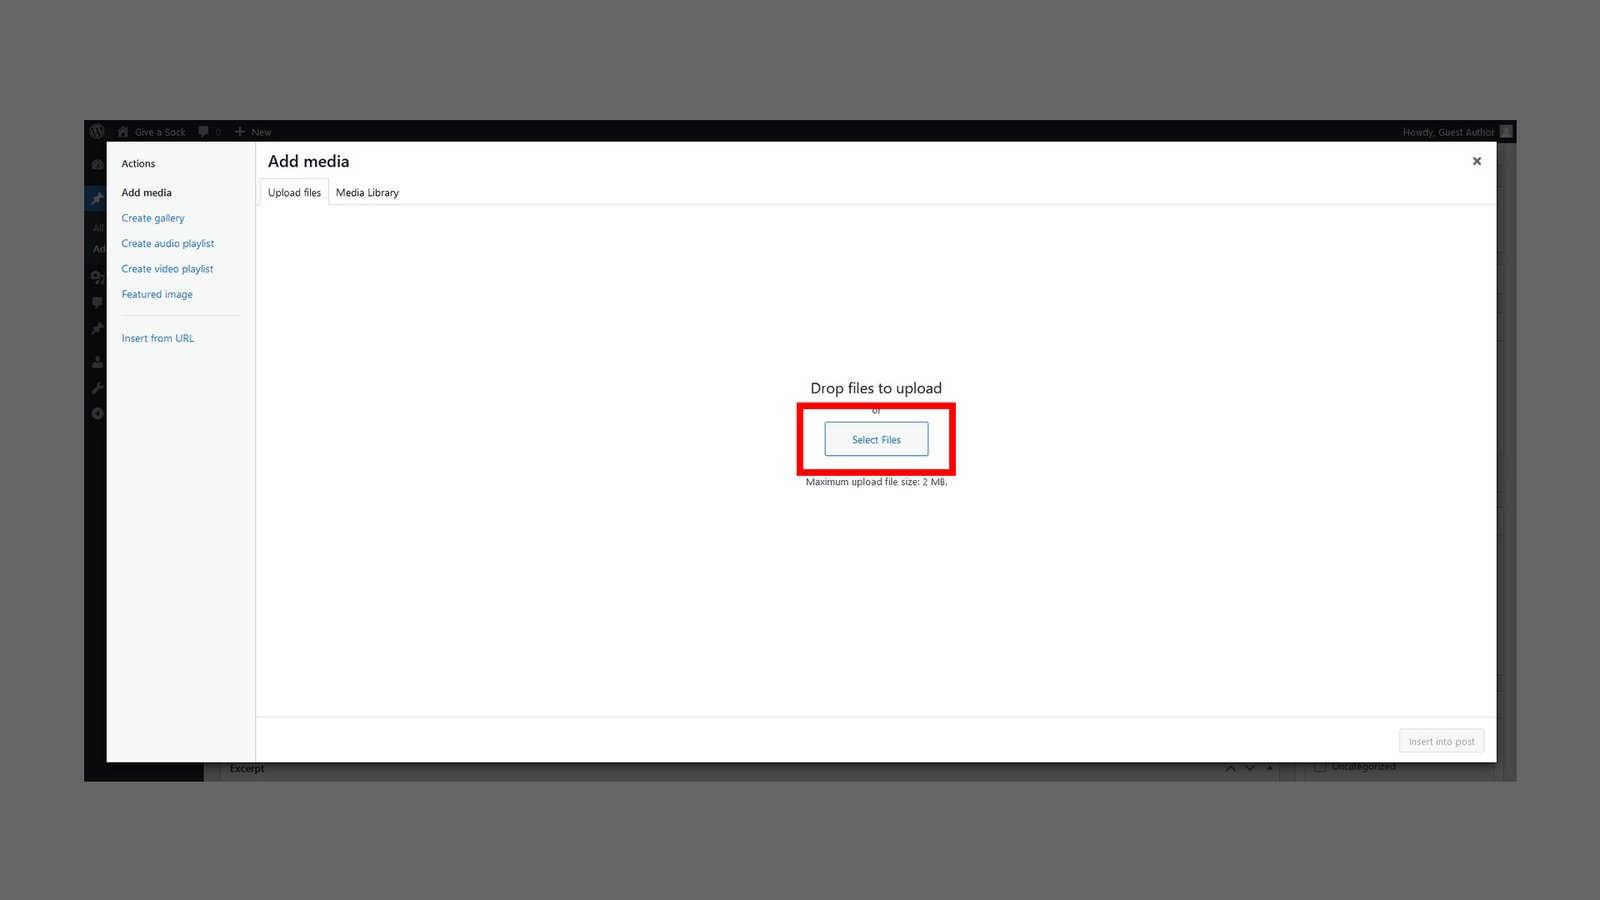
In the Add Media screen you want to click on the Select Files button to find media located on your computing device as seen in the image. This is dependent on your operating system and is outside the scope of these instructions.
Step 9
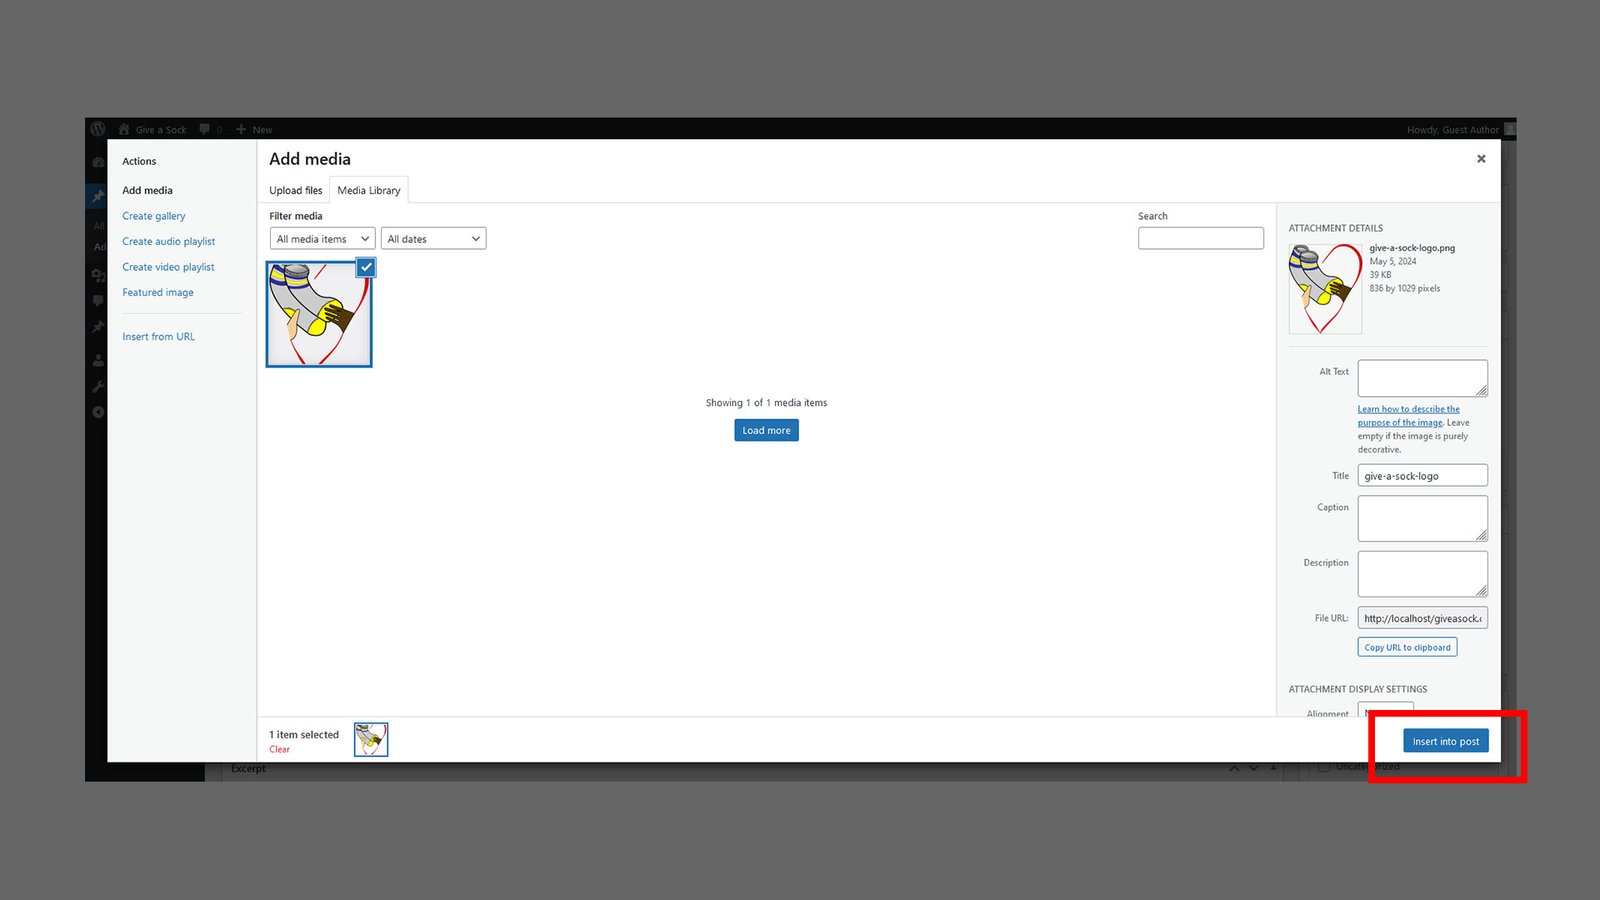
After you locate the media that you want in your post it will take you back to the Add Media screen. The media should have a blue check mark indicating that it is selected. Once it is selected you want to click on the Insert into Post button located at the bottom-right of the Add Media screen as seen in the image.
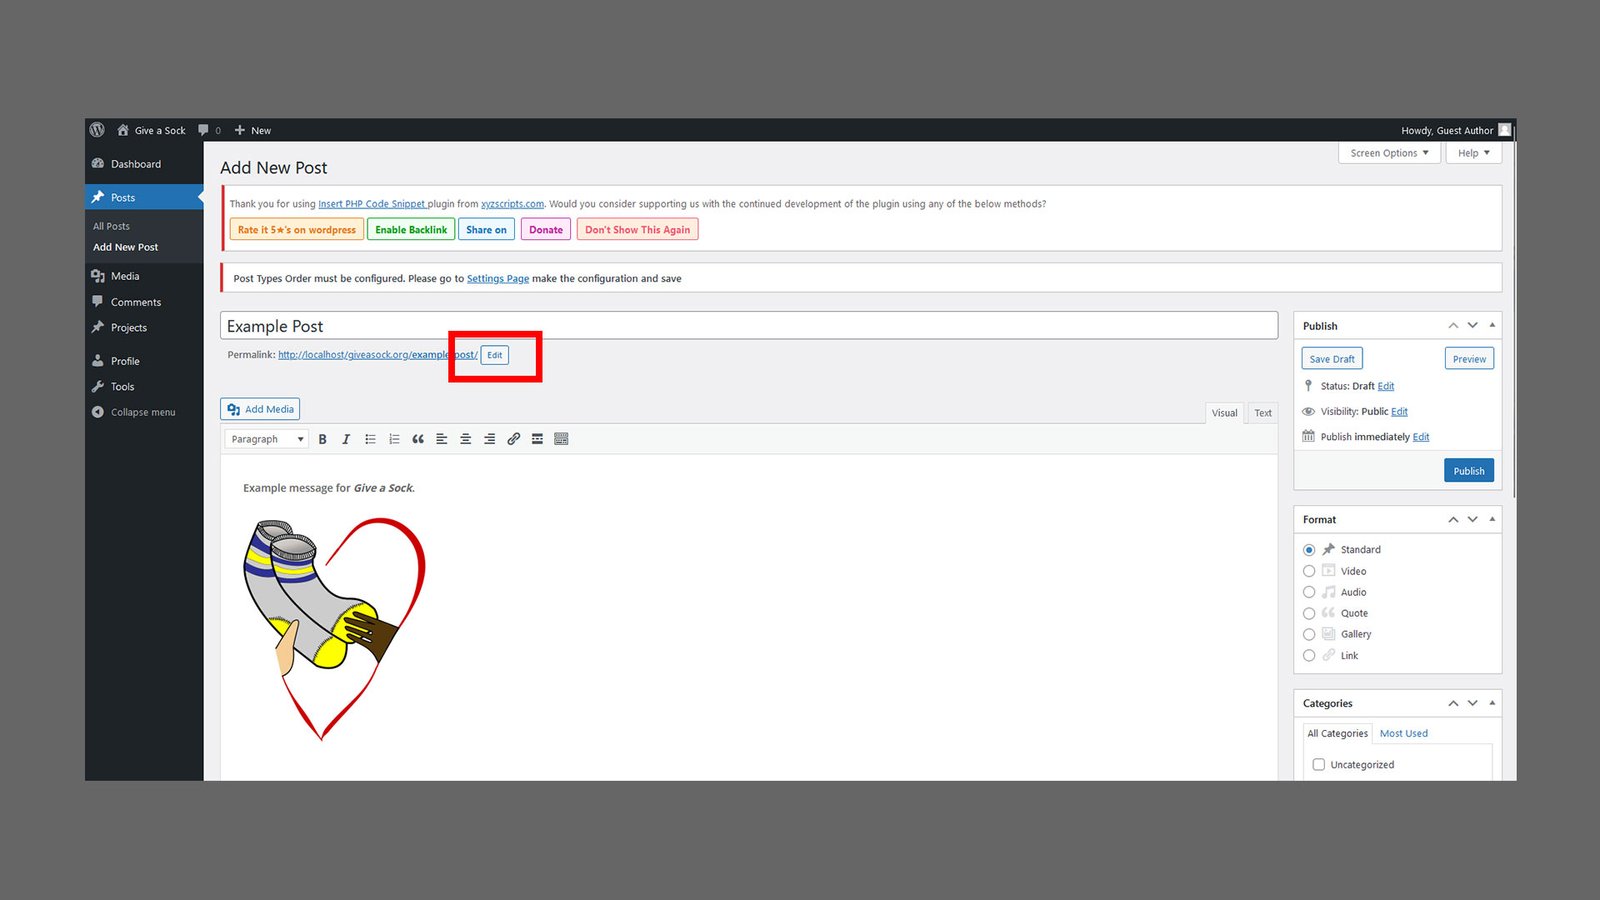
Step 10
This will insert the media into the post. One last thing you can do is change the permalink to your post by clicking the Edit button next to the Permalink directly below the post title as seen in the image.
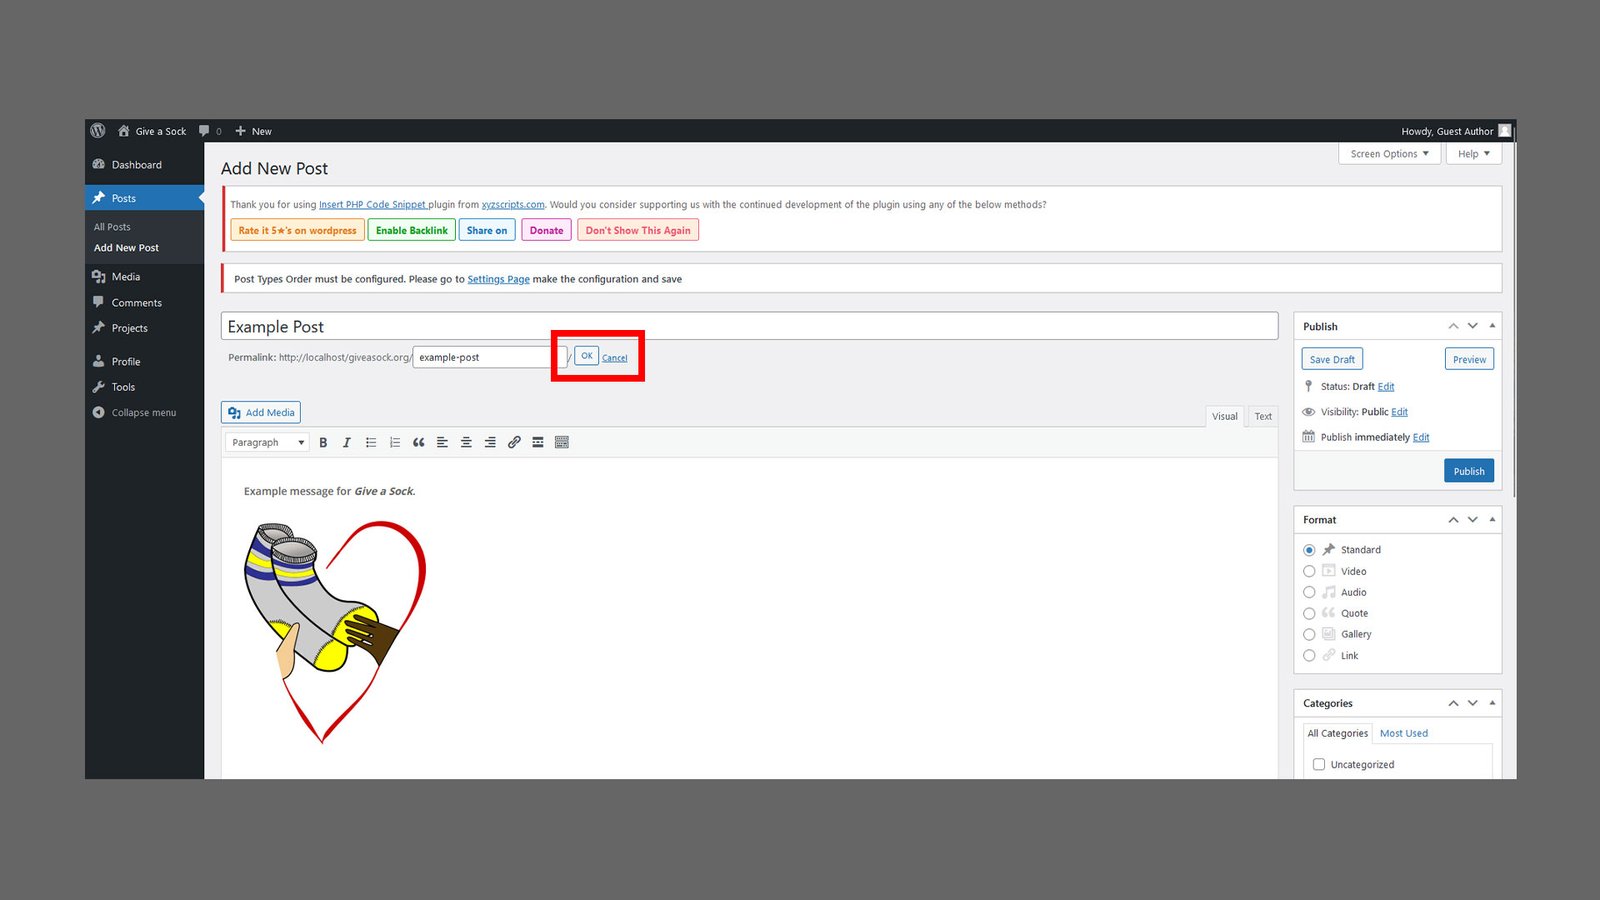
Step 11
The permalink can only have letters, numbers, and hyphens. There is no way to include spaces or other characters. Click on the OK button once the permalink is the way you like it as seen in the image. You will then be able to go directly to your post using this Give a Sock URL after it is submitted.
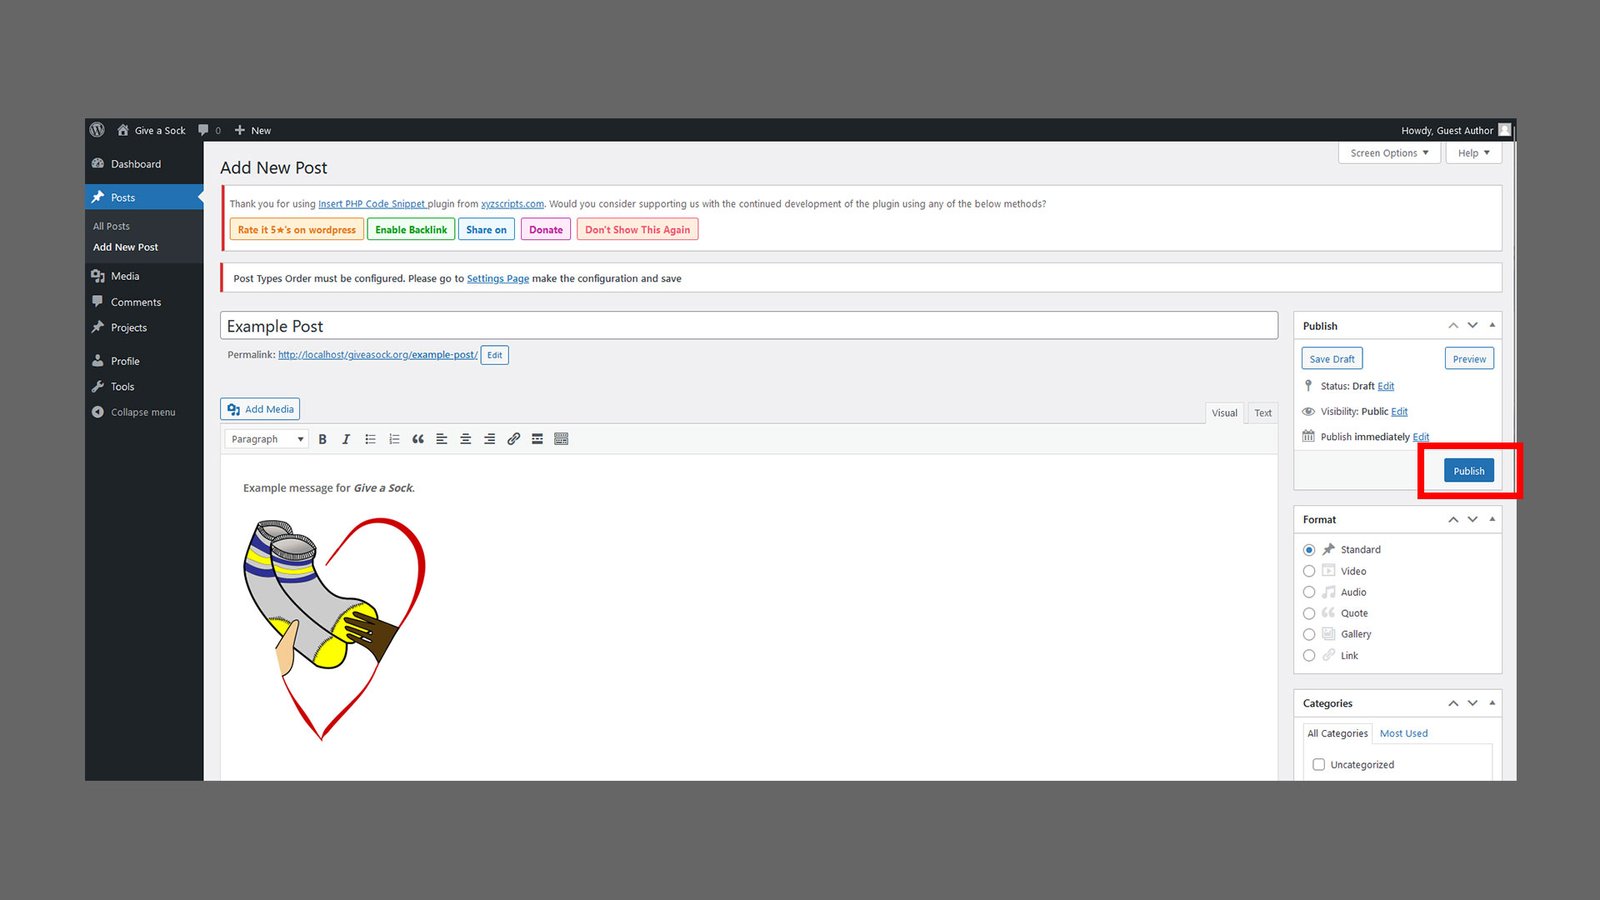
Step 12
Finally, make sure everything is the way you like it. REMEMBER, ONCE YOU SUBMIT THE POST YOU WILL NOT HAVE ANY WAY TO EDIT IT OR DELETE IT. If it is really such a problem that you need to have it removed, contact Nino to assist. This is only a last resort. If everything is good, click on the blue Publish button located on the right side of the screen as seen in the image.